
Yummy Collage Paper Tutorial

I love making my own colorful and messy collage papers. It's one of my favorite techniques to teach, too! Most of my pretty paper ends up happening by mistake. These are papers that I use to catch drips of paint or overspray if I'm working with stencils and spray inks. Sometimes they are the result of being the paper that I leave underneath my journal or canvas while I'm working to protect the surface (table or floor) from being covered in paint! I'll keep a pile of paper nearby just to mop up the mess on a page or if I'm too impatient for my layers to dry. And sometimes when I'm feeling bored or uninspired, I'll just pick a paper and start stamping, drawing or testing out stencils on them. After a few layers, They will be put into a pile for me to use while making art (or they get further used to mop up paint, catch drippings, etc! and the cycle continues!)

Left to right: music sheet, grid paper, planner page, vintage book page, kids homework paper, scrapbook paper)
But let's assume you don't have any messy paper to begin with...no problem! Just gather up an assortment of plain paper that has a little bit of writing/letters/images/numbers from your stash (or kid's backpack or recycle bin). You can also find a variety of awesome paper on Etsy if you just look up "music sheets," "vintage book pages," or "ledger paper." I also have paper packs and collage packs available in my Etsy shop. To make you own, you're gonna need a few supplies you have at home:
Supplies:
- paper (music sheets, book pages, recycled paper, scrapbook paper, grid or notebook paper, etc)
- oil pastels (kids Crayola brand in my favorite)
- spray ink (I like Mr. Huey's, DecoArt Media Misters, Dylusions and Hero Arts in neon)
- stencils (SO MANY favorites--I will have to compile a separate list! Just use what you have)
- texture items (rubbing plates, plastic placemats, silicon trivets--even stencils can be used!)
- paint markers (my favorites are Liquitex, Sharpie water-based, Montana or Molotow in red, black, white, aqua, fluorescent pink & lime green)
- acrylic paint (use your favorite colors. Mine are: fluorescent pink, lime green, aqua, red, navy)
- makeup sponges (for applying paint through stencils)
- fun items for applying paint (I like to use things like: legos, bubble wrap, old gift cards for scraping paint, cardboard, foam brush, etc)


Step 1: First Layer with Oil Pastels and Texture items
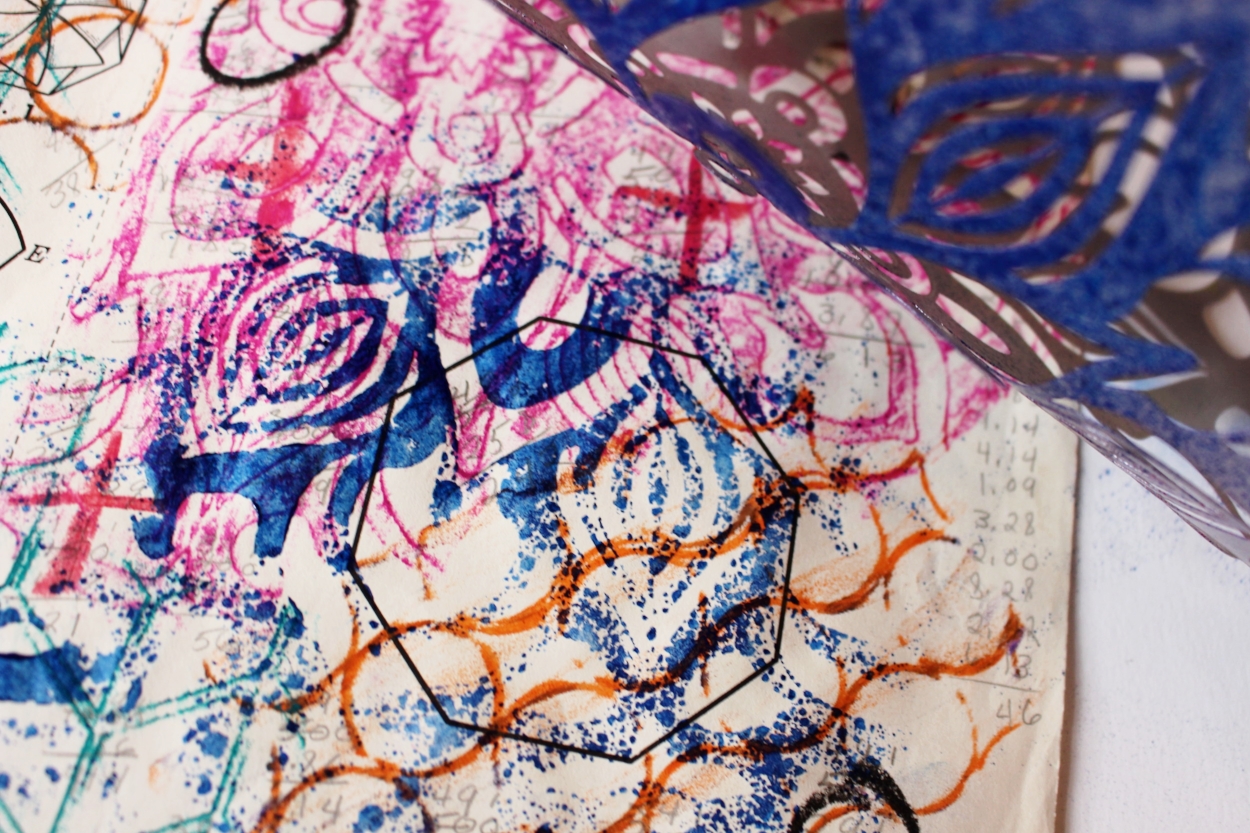
First, you're going to want to choose one of your assorted papers and place a texture item underneath (stencil, rubbing plate, trivet, etc) and take the oil pastel and rub it across the surface of the paper to create a rubbing or imprint of the texture. You don't want to cover the entire paper, just get a little bit here and there, making sure to change the texture item underneath and the color of the oil pastel each time so that you get a nice variety of textures and colors.

This would also be a good time to make some marks with the oil pastel in addition to the texture rubbings. You may want to leave some white space on the pages--it's not necessary to cover the entire page with oil pastels. Once you have covered your papers, you are ready for the next step.

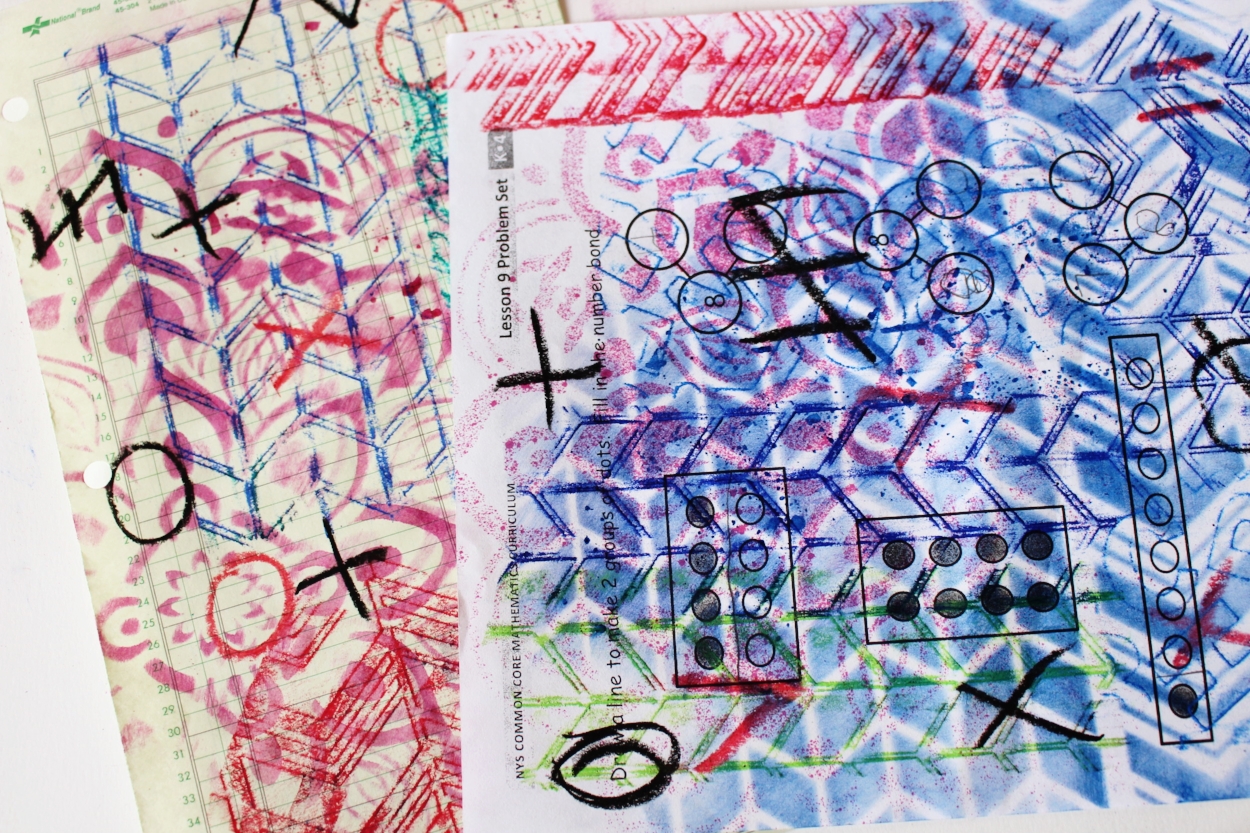
Step 2: Use stencils and spray ink
Once you have all of your papers covered with a nice variety of colors and textures, you can start adding your second layer with stencils and spray ink. I like to use a few quick, light sprays of ink and change out the stencils and ink colors to make sure I have a good variety of colors and patterns. In this step, you can start thinking about contrasting colors (using a dark color on top of a light area or using a contrasting color of ink over the oil pastel layer).

Also, after you spray with the ink through a stencil on one page, you can flip the stencil over onto another page and get a stamped image as well. Be sure to use another paper to press down on the stencil in case any ink leaks through. This will keep it from getting onto your hands and it may even give you another bit of ink transfer onto the paper you press down.

This is a great way to clean your stencil and to make the most use of your spray ink! You can even take a baby wipe and rub any remaining ink onto another paper as well. This gives you a softer, more muted look. It's nice to have a variety of dark and light areas.

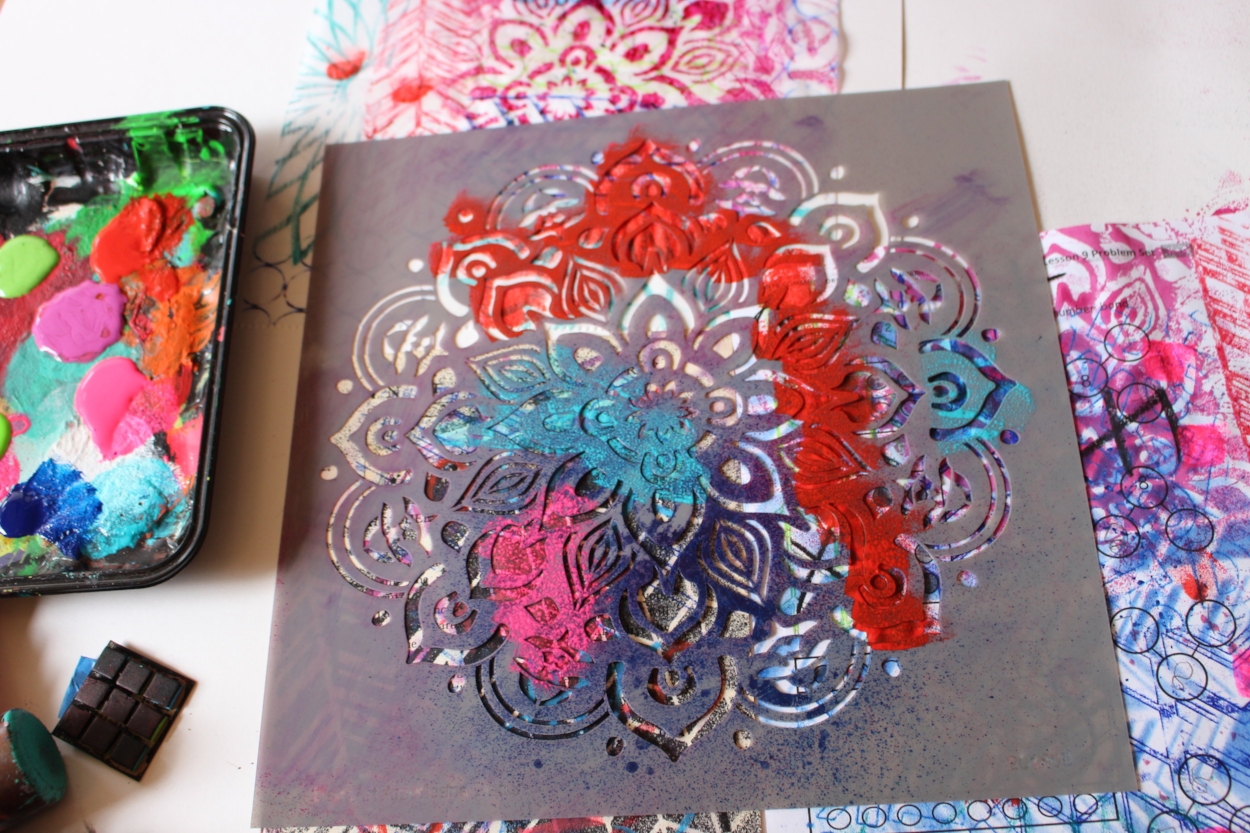
Step 3: Add acrylic paint and paint pens
The final layer is probably my favorite layer and that's where it starts to get really messy and full of crazy colors! Often, I will just use paint pens in this step because it is quick and easy but you can also pull out your favorite acrylic paint colors at this point.

When applying the paint, you can use a variety of tools and techniques. My favorite is to use a makeup sponge through stencils. This allows you to add just a little bit of paint here and there and it also reduces the amount of paint you use, so that you get a really nice, crisp image. If you use too much paint, you may wind up with puddles and leaks under your stencils which result in a more muddy look.
I like working on several papers at a time. Above, I have three different papers underneath one large stencil and then I can apply several colors in different areas all at once. I also like to use unconventional mark-making tools. I'm always on the lookout for anything with an unusual pattern or texture.
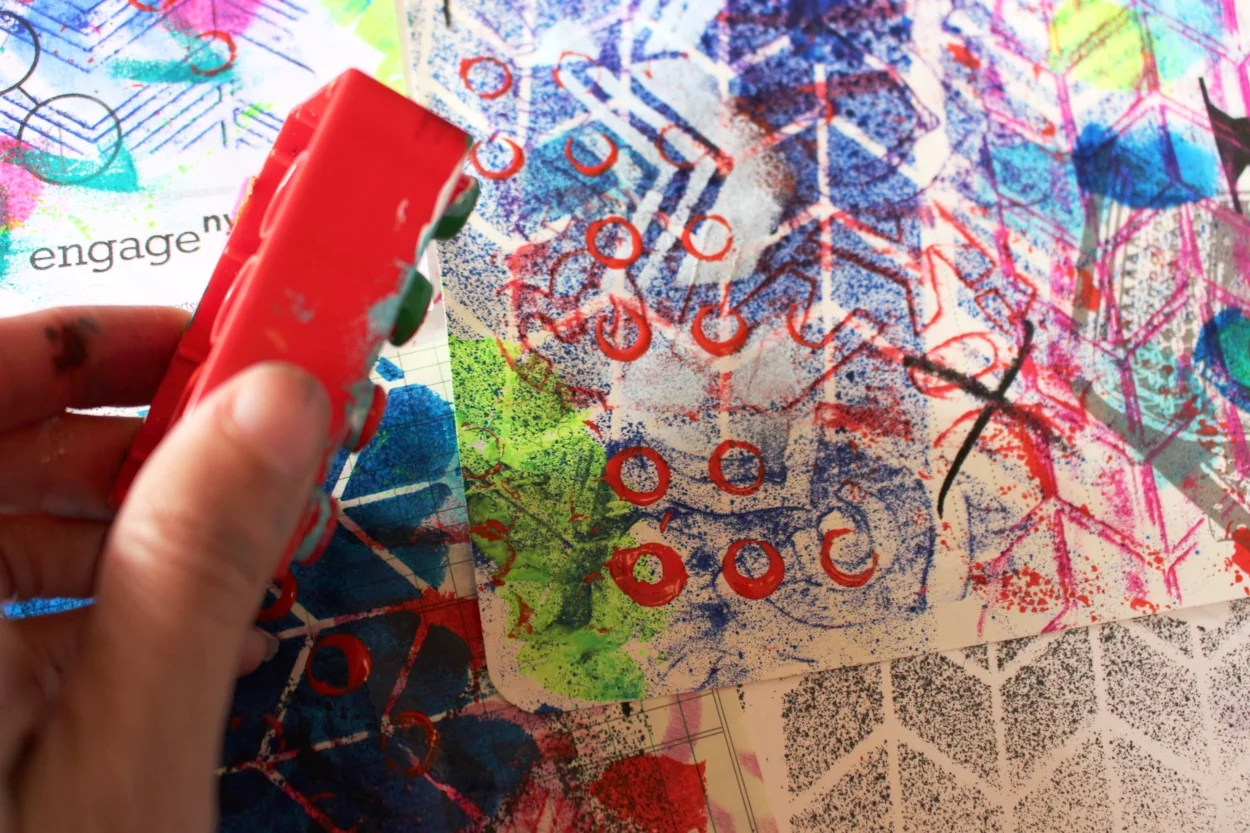
The key is using many different tools to make a variety of marks. Above, I've used a lego brick to make repeating circles, and below is a "tool" I've had for many years--it was a toy that I "borrowed" from my daughter years ago (she still hasn't forgiven me for taking it! haha. She's 14 now!)

It just makes the best little dots! I couldn't help it. :) . Once you start looking around your house for items with unusual textures or patterns for use in your artwork, you will never see ordinary objects the same!

After the paint layer, you can go in with the paint pens and add a variety of marks (dashes, plus signs, dots, splatters, drips, and even smear some of the marks to make smudges) and even add another layer of oil pastel marks. The pages are pretty much done when you love them or when they look like a crazy mess! Either way, they are ready to be torn up and added as a collage layer in your art journal or other art projects. I always have a pile of these papers ready at my art table or in a plastic sleeve in my art travel bag. For more ideas on how to use these beautiful pages, check out this blog post: 3D Collage Canvas. Have fun creating! I'd love to see how your pages turn out! :) You can also check out this youtube tutorial on how I make these yummy collage papers!